How to Use Decorative Circular Borders in Your Design Projects
Decorative circular borders offer a unique and elegant way to enhance visual elements across a wide range of design applications. Whether you're creating digital content, print materials, or personal crafts, these versatile assets can elevate the look and feel of your work. A collection of decorative circular borders typically includes both vector (EPS) and high-resolution image (JPG 300 dpi) files, making them suitable for use in various tools and platforms.
Understanding Decorative Circular Borders
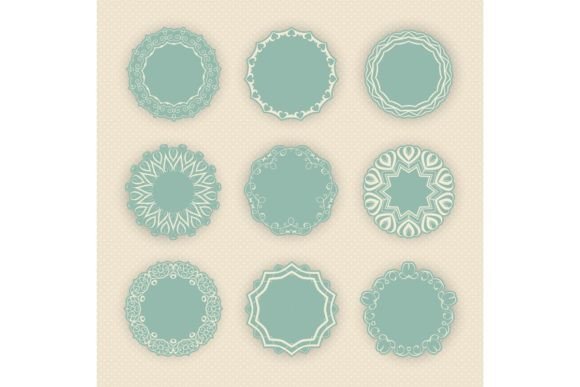
Decorative circular borders are graphic elements that frame or accentuate a central area with intricate, stylized designs. These can include floral patterns, geometric shapes, ornate flourishes, or minimalist lines arranged in a circular format. They serve as visual dividers, attention-grabbing features, or finishing touches that give a polished appearance to any project.
In design workflows, they often function as supplementary assets rather than primary components. Their role is to complement text, images, or other graphical elements by adding structure, style, and visual interest. The key advantage of using a set like Decorative Circular Borders is its adaptability — it's not limited to one medium or purpose.
Applications Across Different Mediums
The versatility of Decorative Circular Borders makes them ideal for multiple use cases:
- Invitations and Greeting Cards: Add a touch of sophistication to event invites or holiday cards by placing a border around the main message or image.
- Websites and Digital Content: Use them to highlight call-to-action buttons, section headers, or infographics without relying on standard rectangular boxes.
- Flyers and Posters: Create eye-catching layouts by framing headlines or featured graphics with circular accents that stand out from typical straight-line borders.
- Crafts and Scrapbooking: Incorporate them into handmade projects for a personalized and artistic flair that separates your work from mass-produced items.
By integrating these borders into your design process early, you can ensure they align with your overall aesthetic and functional goals. For example, when designing a website, selecting a border style during the wireframing stage allows for smoother transitions into final layout execution.
Choosing the Right File Type for Each Task
When working with Decorative Circular Borders, it's important to understand the difference between the file types included — an EPS vector file and a JPG 300 dpi image file — and how each fits into your workflow.
The EPS (Encapsulated PostScript) file is perfect for scalable, high-quality editing in design software such as Adobe Illustrator or Inkscape. This means you can resize the border without losing clarity, which is essential for logos, branding elements, or large-scale prints like posters and banners.
The JPG 300 dpi version is best suited for immediate use in platforms where vector files aren’t supported. This includes social media graphics, web headers, or PDF presentations. The high resolution ensures sharpness even when printed, making it a reliable choice for physical outputs like flyers and brochures.
Using both file types strategically can help maintain consistency across different formats while ensuring quality at every stage of production.
Integration Into Common Design Tools
To make the most of Decorative Circular Borders, consider how they interact with your preferred design tools. Here’s how they can be integrated into common platforms:
- Adobe Photoshop: Import the JPG file directly into your project. Use layer styles to adjust color, contrast, or add drop shadows if needed.
- Adobe Illustrator: Open the EPS file for full customization. You can edit colors, scale the design precisely, and combine it with other vector elements seamlessly.
- Canva: Upload the JPG file to Canva for drag-and-drop simplicity. It works well for quick edits and non-technical users who want to incorporate professional-looking borders without advanced design skills.
- Microsoft Word or PowerPoint: Insert the JPG file as a background or frame for titles and charts. This is especially useful for educators or professionals preparing slides or reports.
For developers or marketers building websites or email templates, the JPG file can be embedded directly into HTML or CSS for consistent visual branding. Meanwhile, designers looking for flexibility will appreciate the EPS file's ability to be resized and modified without degradation.
Workflow Examples: Bringing Decorative Circular Borders to Life
Let’s explore some real-world workflows where Decorative Circular Borders can play a valuable role:
Example 1: Event Invitation Design
- Start by outlining the invitation's size and layout in Adobe Illustrator.
- Import the EPS border file and position it around the central content area.
- Edit the border's color or pattern to match your brand palette or theme.
- Once finalized, export the design as a PNG or PDF for printing or digital sharing.
This method ensures the border maintains its quality regardless of the output format, from paper invitations to digital RSVP links.
Example 2: Social Media Graphic Creation
- Open Canva and choose a template that matches your platform (e.g., Instagram post, Facebook cover).
- Upload the JPG border file and place it around the focal point of the design.
- Add text, images, or icons within the bordered area to guide the viewer’s attention.
- Download the final graphic and upload it to your social media channels.
This streamlined approach allows for fast creation while still maintaining a professional finish through the use of the border asset.
Design Considerations and Best Practices
While Decorative Circular Borders are visually appealing, their effective use depends on thoughtful planning and execution. Here are some practical tips to keep in mind:
- Contrast and Color Harmony: Ensure the border complements the rest of your design. If your background is busy, opt for a subtler border; if it's plain, a more detailed border may provide the necessary visual interest.
- Placement and Purpose: Use the border to draw attention to specific areas. For instance, in a flyer, you might surround the event date and location with a border to make it stand out.
- Consistency Across Projects: Choose one or two border styles and reuse them across related materials to create a cohesive brand identity.
- Testing Compatibility: Before finalizing a design, test the border in all intended environments — whether on screen or in print — to confirm it looks good everywhere.
Also, consider organizing your assets. Save the EPS and JPG versions in a clearly labeled folder alongside other design elements so you can quickly locate them when needed. This helps streamline future projects and supports long-term usability.
Enhancing Creativity and Productivity
Decorative Circular Borders can also act as a productivity tool for creators who want to maintain a consistent visual language without spending excessive time on custom illustrations. By having pre-designed, high-quality borders available, you reduce the time spent on repetitive tasks, allowing you to focus more on the core message or content of your project.
Entrepreneurs and small business owners can benefit significantly from this resource. When launching new products or services, promotional materials must reflect professionalism and attention to detail. Using a border set like Decorative Circular Borders helps achieve this goal quickly and affordably.
Combining With Other Assets and Tools
These borders don't have to stand alone. Pairing them with other design elements can lead to more dynamic compositions. For example, you might combine a circular border with a subtle gradient background to create depth, or overlay it with transparent textures for added dimensionality.
They also integrate well with typography tools. If you're using Google Fonts or Adobe Fonts for a project, the border can frame a headline or logo to reinforce its importance. Similarly, when using icons from sites like Flaticon or The Noun Project, a border can help unify the visual hierarchy.
Collaboration tools like Figma or Sketch allow teams to import and share border assets efficiently. This ensures everyone has access to the same design components, reducing inconsistencies and improving workflow efficiency.
Long-Term Use and Reusability
One of the biggest advantages of a downloadable border set is its reusability. Once you’ve found a style that works for your brand or personal projects, you can apply it repeatedly to maintain a familiar visual identity. This is particularly useful for bloggers, publishers, or educators who produce content regularly and need to keep their materials visually aligned.
To support long-term use, store the files in a centralized asset library. Name them clearly based on their style or intended use (e.g., “Floral Border – Events,” “Minimalist Border – Web”), and back up the originals so you can always return to the highest quality version.
Over time, you may find yourself using the same border across multiple platforms — from print flyers to online banners. Keeping track of these uses helps you build a recognizable style and avoid unnecessary redesigns.
Final Thoughts on Implementation
Integrating Decorative Circular Borders into your creative or business processes is about more than just aesthetics — it's about enhancing functionality and communication. A well-placed border can direct the viewer’s eye, establish visual rhythm, and even convey meaning depending on the design.
Whether you're an experienced designer or someone new to the craft, these borders offer a simple yet powerful way to refine your output. Use them before a project begins to define your visual direction, during the design phase to add polish, or after finalization to ensure consistency across deliverables.
By understanding how these assets fit into your broader workflow and leveraging the right file type for each task, you’ll unlock greater efficiency and creativity. Keep experimenting with placement, pairing, and styling to discover what works best for your unique needs.